6 7 8 9 10
brad131a4
brad131a4 Reader
4/26/18 9:37 p.m.

Hey Mez I have a big set of crimpers that can do the leads for that # 4 or? wire. All that wire and parts are making me a little giddy.  How are your calipers? I might have a couple extra laying around if you need some. Most my parts are 124 but I know the brakes are the same.

Mezzanine
Mezzanine Dork
4/27/18 1:48 p.m.

Big crimpers will be needed for my main power supply and ground for sure! We'll need to make a date to have you out soon...but you might want to check with Burrito first to see if he'd recommend it now that he has a solid day of me talking at him and being present for my general verbal processing. cheeky

As for the calipers, I think I have a set of two spares in the boxes of crap that came with my car. They might even be new? One of the rear calipers on this car continues to bind even after repeated wedge-removal/polish/lube/replace cycles. I think I'm going to swap a spare in and replace the hoses while I'm at it. The car came with a complete set of new rubber hoses. SS would be nice, but I'll run what I've got for now.

Before he came out, here's the things I got done:

Managed to find a machine shop that could turn a tiny little baby flywheel. If you're in the Tacoma area, look up John's Specialty Service. Husband and wife team, and good people. They got it balanced in ONE DAY! I was banking on it taking a week. They had to remove a bit of material to get it to spin true, and they left some really nice index marks:

Chased the threads on the block for the oil pan. This was gross. Clean your threads, kids:

Started on the new alternator mount. I'm switching to a common GM alternator that you can find anywhere. I picked this newly rebuilt alternator up on eBay for $35 shipped, but I need to modify the mounting arrangement on the Lampredi to fit. Start by cutting the block mount down to make the sheaves line up properly.

Then I did lots of hand filing to get everything just the way I wanted it. There was a casting protuberance on the alternator that impacted the water pump housing and prevented me from tilting the alternator in enough to get the belt on. Filed that off too. Then I had to come up with a tensioner arm. This arm is stock on the 1500 motor, and is actually close to usable as is with this turnbuckle I had laying around. Notice the strengthening rib right where I need to put a bolt? A little heat and hammer took care of that.

That'll do nicely. Everything is single shear, but whatever. It's just holding an alternator.


Mezzanine
Mezzanine Dork
4/27/18 5:12 p.m.

So yesterday was a fun shop day. This handsome Burrito came out and found some scrap wires in my engine bay.

We spent a lot of time arm waiving over the car; I needed Burrito to validate all the silly ideas I'm planning for the car. And like the best of friends, he agreed with me and helped to enable some of these dumb ideas to move into the next stage.

Here's what we worked on:

  • Removed extraneous wires from engine bay
  • Consulted wire diagrams extensively to find wires to remove
  • Settled on using the pink wire powering the original coil as the switched supply to my new power distribution panel. Proceeded to find that it was basically stuffed into the connector under the dash and not really wired properly. Good news - Midwest has a stock of replacement terminals, so I can fix this up right.

  • Attempted to remove crank pulley nut with a crescent wrench.
  • Went to store and bought proper socket. And taco truck burritos, naturally.
  • Removed crank pulley quickly and easily with proper tools. Did some head scratching over a crank position sensor. The Yugo Motronic stuff won't work since it takes a special timing belt and sheaves. We concluded that I need to try to find a 5.5"-6" trigger wheel, then turn a shoulder into the crank pulley and press the trigger onto it. Will need to fabricate custom trigger mount too.
  • Opened a package that came in the mail. Some 3D printed sex arrived straight from our Lambo brother corsepervita:

The fit is absolutely without flaw. No sanding, blending, rubbing. Well...maybe some rubbing.

  • Turned down the mounting surface of the new adjustable cam sprocket I bought from Vicks. It was 3 thou undersized, but I suppose that's what you get for the bargain basement brand sprocket. Made a plan for cam position sensor location and trigger. 

  • Burrito worked diligently to get engine ancillaries cleaned up. Lots of threads were chased, parts scrubbed, and gaskets applied. We found one stripped hole for the thermostat housing. Helicoil replacement on its way already.
  • Swapped the water pump housing over to the later style without the heater return - the crossover pipe I'm using has a nipple for the heater return, so I'll go with this cleaner option.
  • Tapped threads into the intake manifold coolant circ ports. Ordered a bottoming tap and some grub screws to plug these ports up. There was lots of this:

Honorable mention to Hungary Bill for the aerospace antiseize. We talked about you.

  • Made an extensive shopping list of all the many things I need to buy still.
  • Knocked out the old freeze plugs and scraped as much rust out of the coolant passages as possible it was gross in there. This pic pretty much sums up our day. Powdered iron oxide, compressed air, wires, loom tape, gasket scrapings, and tapping fluid:


corsepervita
corsepervita HalfDork
4/28/18 9:08 p.m.

I can't wait to see a video of first start!  I'm glad the velocity stacks made it safely!

wheelsmithy
wheelsmithy Dork
4/28/18 9:25 p.m.

The ever increasing momentum is spectacular!

Ransom
Ransom PowerDork
4/28/18 9:36 p.m.

In reply to corsepervita :

Nice work on those things!

corsepervita
corsepervita HalfDork
4/28/18 10:22 p.m.
Ransom said:

In reply to corsepervita :

Nice work on those things!

Thank you! I'm ecstatic he likes them.  I won't hijack though, I'm stoked for this project!

Hungary Bill
Hungary Bill PowerDork
4/29/18 1:45 a.m.

Dude, this thing is taking off QUICK!  Is there going to be anything left to do when I visit in June???


Burrito
Burrito Dork
4/29/18 2:24 a.m.

In reply to Hungary Bill :

June, you say?

Mezzanine
Mezzanine Dork
4/29/18 9:08 a.m.
Burrito said:

In reply to Hungary Bill :

June, you say?

How did I not know about this?!!

There will definitely be work to do in June...I'm hoping it is TUNING work! laughcheeky


Just kidding, it will probably be body work. Lol.


Hungary Bill
Hungary Bill PowerDork
4/29/18 11:08 p.m.

Sooooooooooo bring the paint shooter?  devil

Unfortunately I get a whoppin two days in Tacoma.  Three in Mount Vernon.  Family.... whatcha gonna do? wink

Mezzanine
Mezzanine Dork
4/30/18 2:01 p.m.

Spent some time this weekend making things. As I was crawling around in the engine bay, I spotted the wires that Burrito discovered while he was cleaning things up. He said there was a bunch of splices and that I'd want to replace it...I asked him to just make sure it was visible for now so I wouldn't forget. Check these babies out:

Same wire, two splices within 12".

Moving on: I want to add a knock sensor to the block for tuning purposes. A knock sensor not in a carefully selected location and tuned to the frequencies of knock your engine might produce is of pretty limited value, but it's still better than listening by ear. The Lampredi block doesn't have ANYTHING approaching a good place to mount the sensor. The front side of the block is out of the running due to the jackshaft driving the oil pump and (formerly) the distributor and fuel pump. The rear of the block only has one spot that looks like a boss I could drill/tap. But it's already in use as the coolant drain. Well. It's better than nothing.

It's too low on the block, but at least it's somewhat centered between the #2 and #3 cylinders. The hole in the block is too big already to just tap for the right M8 fastener for the sensor...so I had to come up with a special fastener. Drawings happened...that's how you know things are serious.

Enter my Logan lathe - the real MVP of this project. It has already done so much for this car, and I've got plenty of jobs left for it. Here's the steel stock chucked up with a little basic layout:

A few minutes later I had a good start on my special "double-ended-dildo bolt".

Waiting for new dies to show up since I can't cut metric threads on my lathe, nor can I cut tapered NPT.

Another job for the lathe: when removing the distributor from my engine, I need to come up with something to hold the oil pump gear down. Apparently this is a common thing (since there are other engines in the same fam with a cam driven distributor), so I was able to buy a plug off the shelf. The length needs to be modified to fit though.

alfadriver
alfadriver MegaDork
4/30/18 2:17 p.m.

In reply to Mezzanine :

Have you guys looked into making a new wiring harness?  May be a lot better to do that than hope you can find all the bad splices.  It's really easy to do- the hardest part is finding the right color wires.  The pins can be gotten for free from Molex- find the right ones, and ask for an engineering sample- they will send you 100.

Mezzanine
Mezzanine Dork
4/30/18 4:50 p.m.

In reply to alfadriver :

New harness for sure - The body wiring stays in the car and it's actually solid. There was some standard former owner hackery in the engine bay, but all that has been removed. The new harness is largely the engine management, but includes any ancillaries I'll add from here on out. Write-up to come as I get started on that process.

I was excited when I saw you'd responded - any input on my knock sensor plans?

Mezzanine
Mezzanine Dork
4/30/18 5:09 p.m.

What was supposed to be a short project: changing out the bushings in the dogbone torque mount. The replacement rubber is apparently a motor mount from a Bel-Air or something...and it took a few hours of berkeleyery to get them squished in there. Too much effort to save a few bucks over a new mount. New next to old:

Installed:

alfadriver
alfadriver MegaDork
4/30/18 5:41 p.m.
Mezzanine said:

In reply to alfadriver :

New harness for sure - The body wiring stays in the car and it's actually solid. There was some standard former owner hackery in the engine bay, but all that has been removed. The new harness is largely the engine management, but includes any ancillaries I'll add from here on out. Write-up to come as I get started on that process.

I was excited when I saw you'd responded - any input on my knock sensor plans?

One area that I'm not too good with...  The one thing I'd make sure is that the tip of the sensor is in contact with metal- wherever it ends up being.  

Mezzanine
Mezzanine Dork
4/30/18 6:42 p.m.

Magic knock sensor bolt is finished. Both of my dies showed up today, so I cut threads and also machined two flats with the Atlas Shaper.


In situ, solid metal to metal contact all the way around:

Hungary Bill
Hungary Bill PowerDork
5/1/18 2:42 a.m.

I want your shop surprise

Mezzanine
Mezzanine Dork
5/1/18 5:54 p.m.

Another day, another lathe project.

Pressed the old bushing out of the snail motor mount. There's three on the car: the snail on the right side of the car, one under the power train right where the engine and trans mate up, and the dogbone that serves as a torque mount at the rear of the engine, mounted to the top left edge of the cylinder head. Old bushing came out easily enough; I went on to press the pin out of the rubber too. It needed a little fire to clean the residue off of it.

Poly bushing pouring lessons from our Ethnic Food Wrap Aficionado:

  1. The poly he used didn't stick to the metal surfaces. He was anticipating some level of adhesion, but apparently the pin could slide around in the mount.
  2. Many castable urethane products are super thin. Lower viscosity than water. Be careful to dam up your mold carefully.
  3. Urethane will show the surface of your tape or dam perfectly. Choose your surfaces wisely.

To address lesson #1 above, I chucked the pin up in the lathe and cut a groove in it to accept a large home-brew circlip, visible in the photo below. Pro tip: don't attempt to enlarge the hole of a hardened washer with one of your good morse taper drills. angry Anyway, after getting the washer dimensions right, I cut a slot, opened it up, and then hammered it tight on the shaft. Here's the whole heap.


I then dammed up the underside of the mount with some aluminum duct tape that's pretty smooth, in an effort to address lesson #3. I laid a bead of hot glue around the pin where it penetrated the tape at the bottom. Ready to pour:

The product I used is from Smooth-On; they're about the biggest name around for castable urethanes, plastics, etc. I made a complete WAG about the product to go with and chose a 80A durometer urethane called PMC-780 dry. From these guys: Reynolds Advanced Materials

Mix 2:1 by weight or volume. I chose weight because it's soooo much easier to be accurate than by volume. I also opted to fill my new lower mount voids with it to stiffen it up a tiny bit. Pour:

Mezzanine
Mezzanine Dork
5/3/18 9:27 a.m.

No major Fiat progress yesterday - had a friend come over to get some safety chain eyes welded to his hitch.

My cat sat on my lap while I flipped wires around. Did the pin out work on the two ECU harnesses last night. Everything is labeled and separated into major groups of where they go on the car. Hoping to assemble the motor and trans today so I can put it in the engine bay at least temporarily to aid in wiring layout.

She's one tolerant cat to put up with all these wires laid across her bed and draped over her head.

NOHOME
NOHOME UltimaDork
5/3/18 9:36 a.m.

In reply to Mezzanine :

What is it with Cats and paperwork of any kind?


Pete

SkinnyG
SkinnyG SuperDork
5/3/18 9:48 a.m.

Your knock sensor location might be just fine - GM used the block drain holes in the V8's way back.  I'm interested in how well it works for you!

Mezzanine
Mezzanine Dork
5/4/18 11:55 a.m.

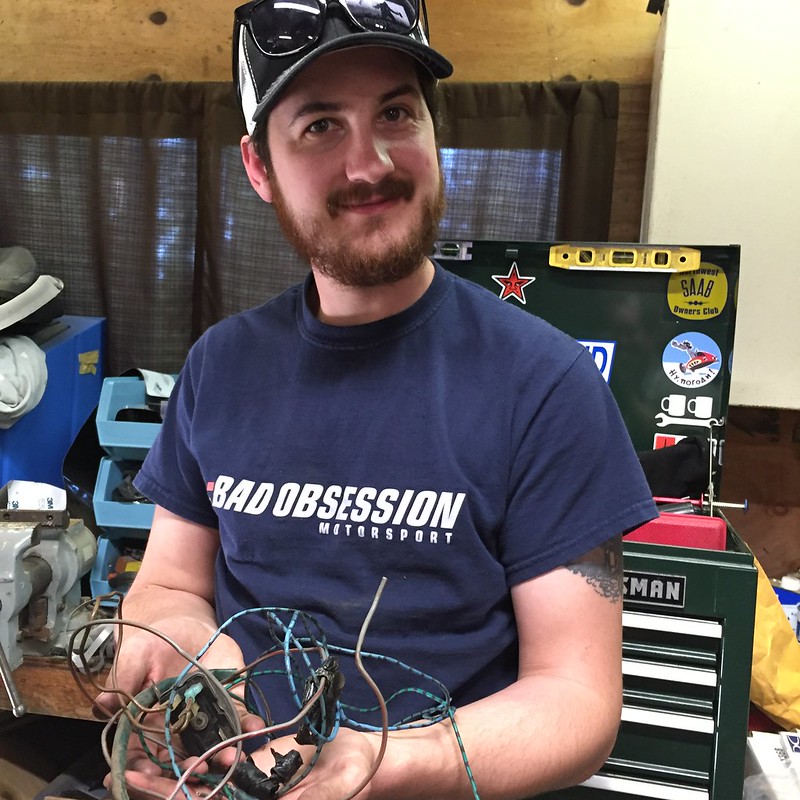
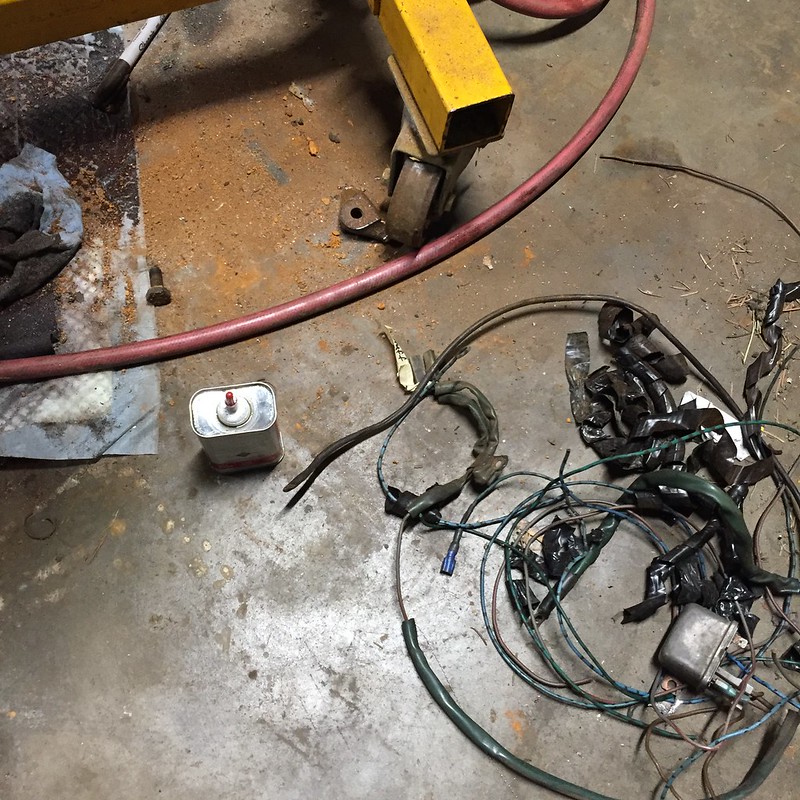
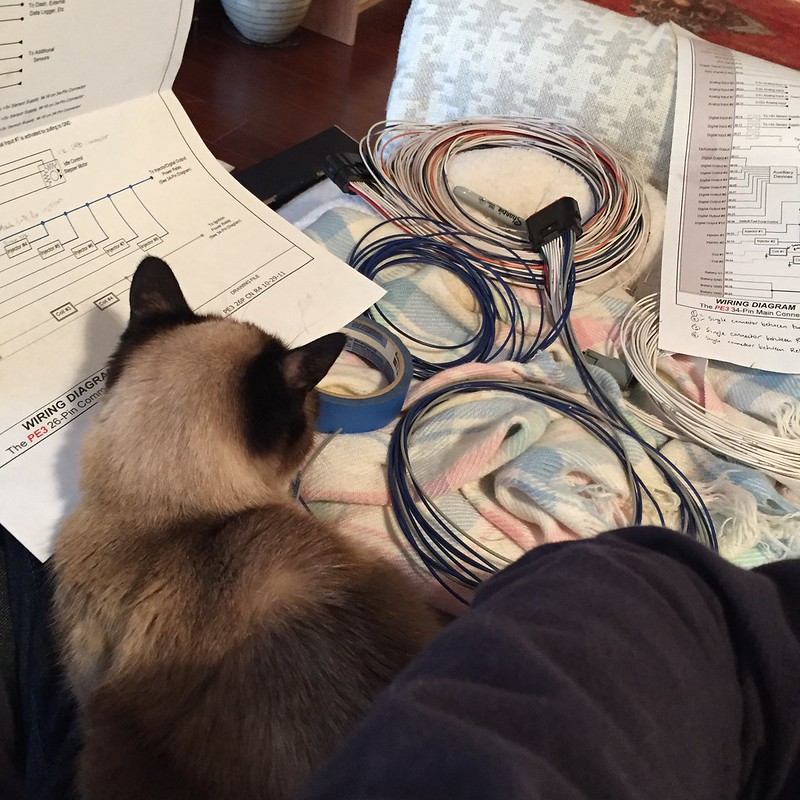
It's time to talk wiring. I've put this part off as long as possible because I'm so excited and also nervous to start this phase. This is where E36 M3 gets real, and I'm dead set on doing a really solid job here.

I won't post all the wiring diagrams here and bore everyone, but I will break out the major components I'm working with. Note: I'll be including lots of data about specifics and what connectors are used where mostly for my own documentation. It might get boring.

Major Components:

  • ECU Inputs (sensors),
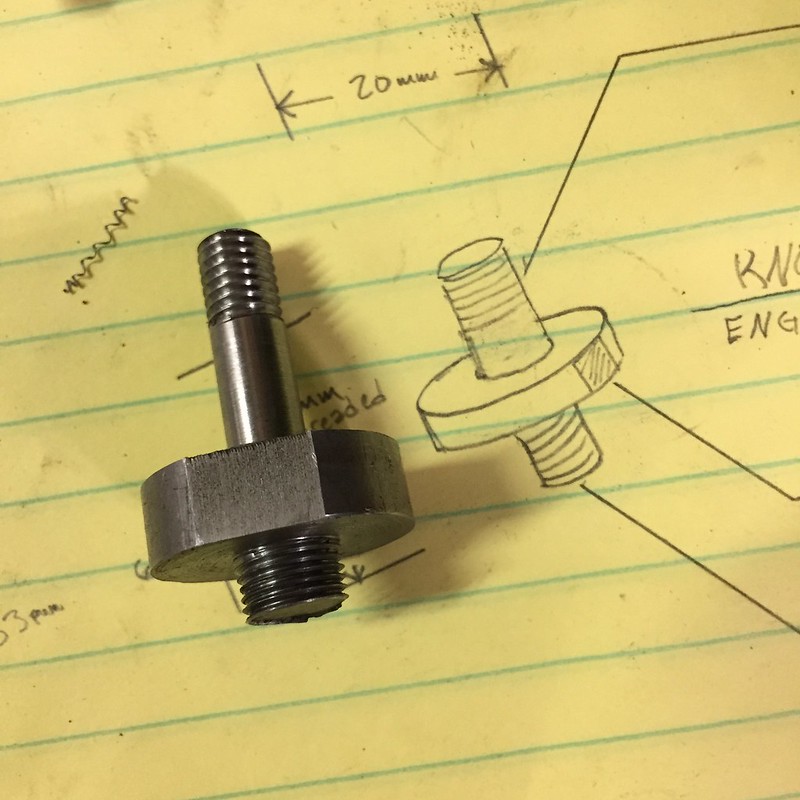
    • Crank position: hall effect, Honeywell p/n TBD
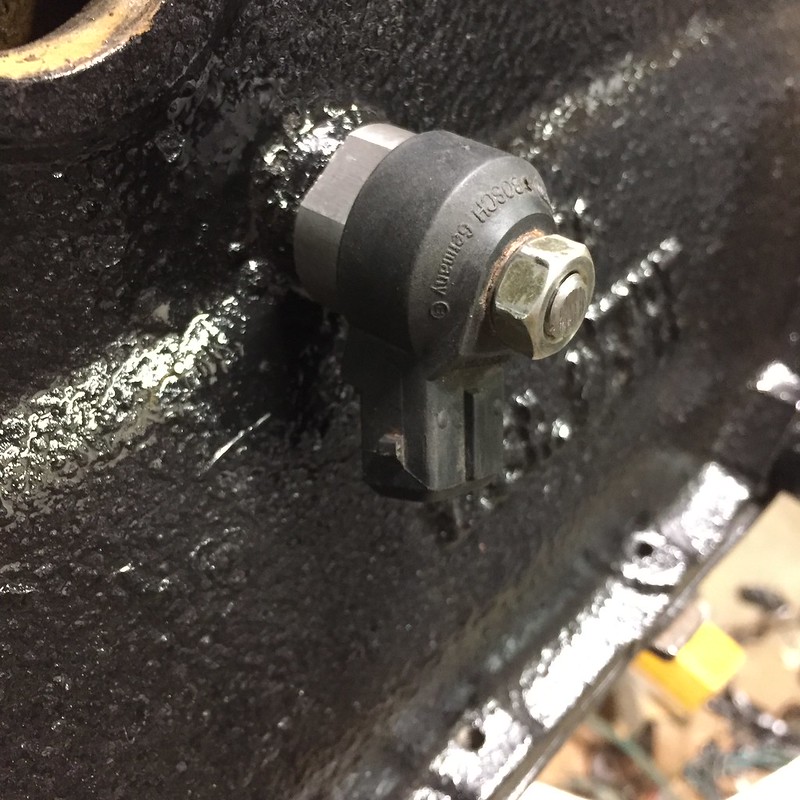
    • Sync/Cam position: hall effect, Honeywell SNDH-H3C-G03. Connector: Bosch 3-way Kompakt 1.1a 2.8
    • Throttle position: Wabash 971-0001, for 2000-2005 Rover 2.5L V6. Connector: AMP Jr. power timer 3-way
    • Intake air temp: AC Delco 213-190 (LS1, LSx). Connector: Metri-pack 150.2
    • Coolant temp #1: (mounted in Fiat 1500 EFI thermostat housing) Bosch 0 280 130 026 (euro cars everywhere). Connector: EV1
    • Oil pressure sensor #1: AC Delco 12573107 (GM). Mounted in block port next to oil filter. Connector: Delphi GT 150 3-way 3.5mm centerline
    • Coolant temp sensor #2: factory Fiat, in cylinder head, for stock dash coolant gauge.
    • Oil pressure sensor #2: factory Fiat, in engine block by PCV port. For stock dash idiot light only.
    • MAP sensor: GM 1 Bar AC Delco 213-1545. Connector: Delphi Weather Pack tower 3-way
  • ECU Outputs (injectors, coils)
    • Injectors: Bosch 0 280 156 161. 23#/246cc (Ford Focus '03-'07). Connectors: EV6
    • Coils: LS9 GM 12611424/ AC Delco D510C. Connectors: Delphi 4-way GT 150 3.5mm centerline. Using a LS3 GM coil harness, p/n 12579355. Single Deplhi Metri-pack 150 8-way. 
  • ECU: Performance Electronics PE3. There's lots of reasons I chose this ECU - cost, functionality, tuning software, support, GRM advertiser, etc.
  • Power distribution: I chose a Cooper Bussmann 15303-2 because it integrates relays with fuses in a very compact package. This module can be configured bussed or not , and has about 6 different models. Choose carefully. I learned a TON reading this site: http://www.bodenzord.com/archives/583
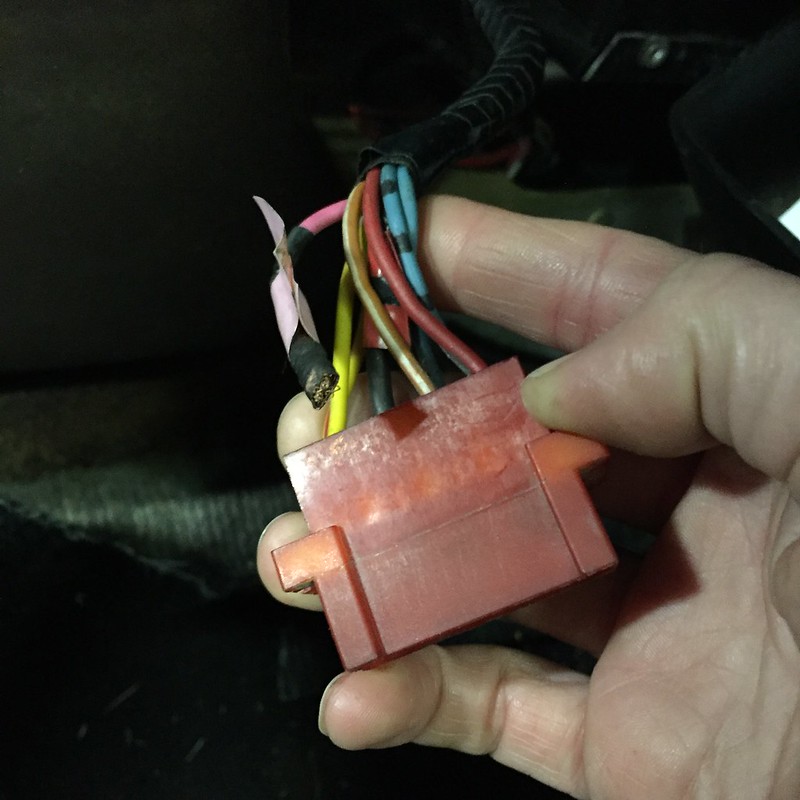
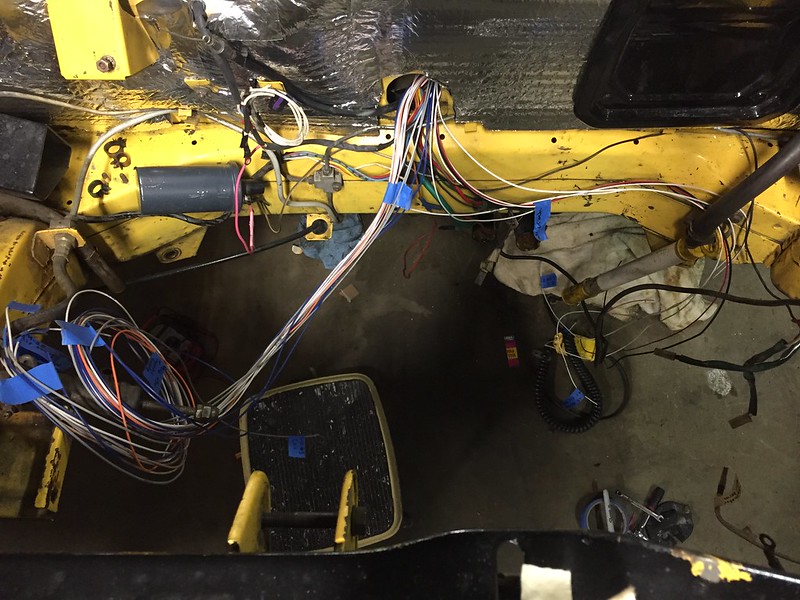
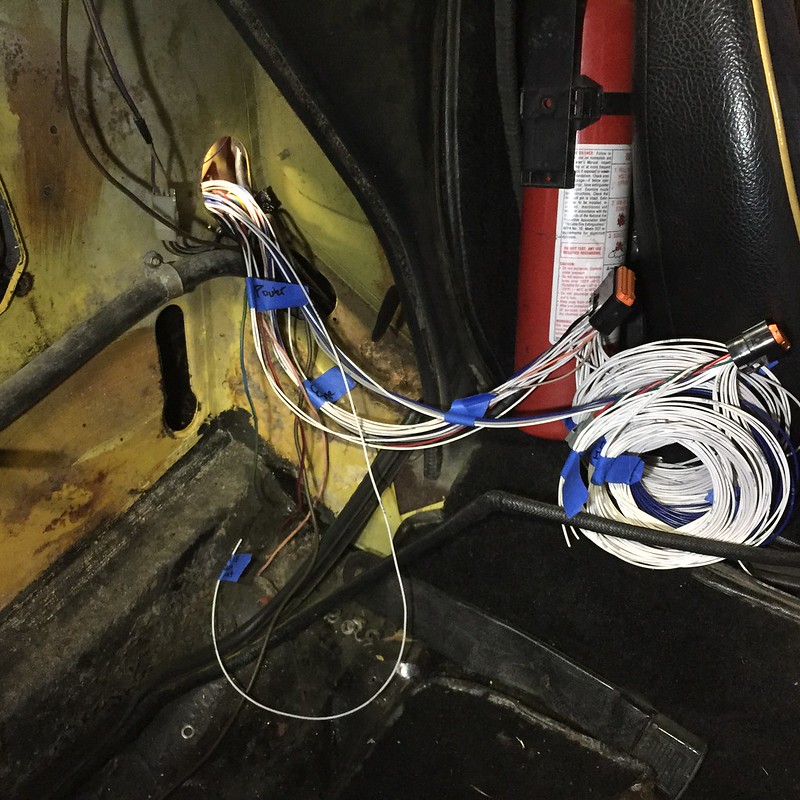
  • Harness general
    • Full harness stands alone and completely removable. Only tools required are for loosening ring terminals at grounds.
    • Integration to factory Fiat wiring is limited to switched power from former stock coil power supply, and tach input from ECU.
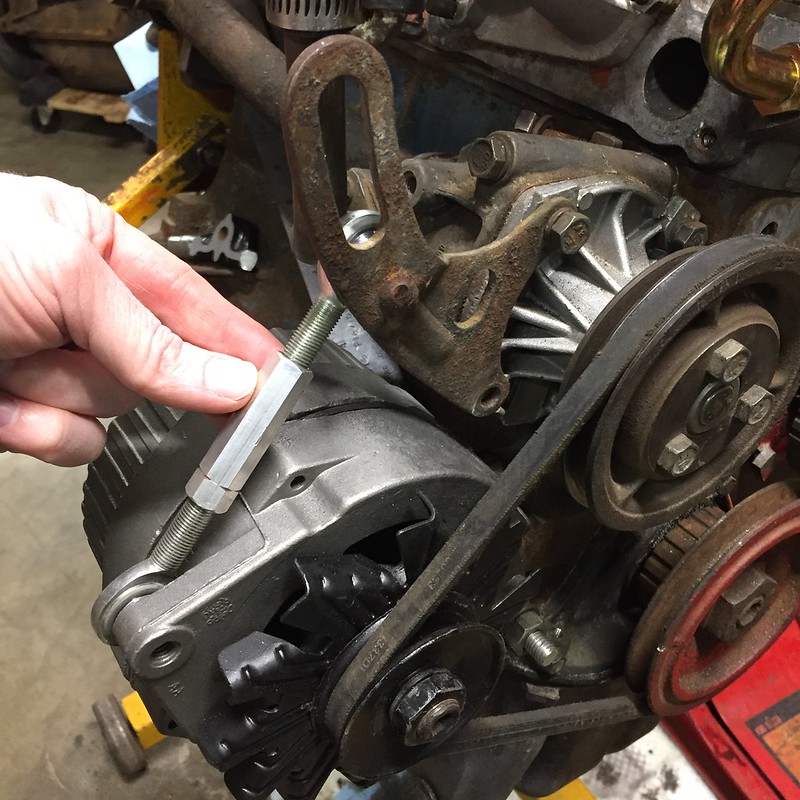
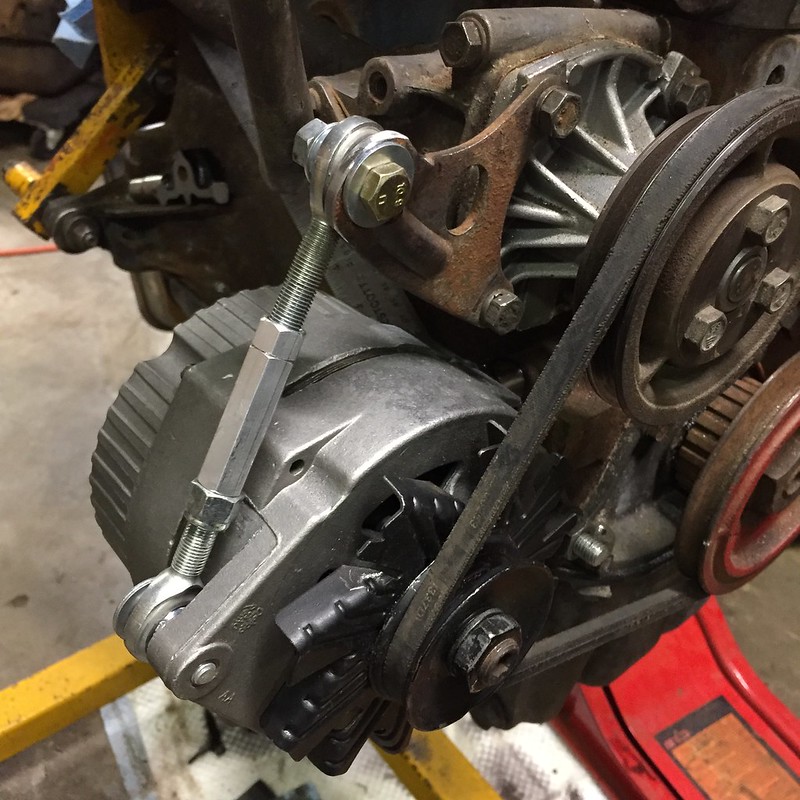
    • Alternator wiring all to be redone to reflect upgrade to GM Delco 7427-3N 63 amp internally regulated. 10SL case, 9 o'clock
    • Power to distribution module pulls indirectly from the starter lug by way of a Blue Sea 7087 100A panel mount breaker
  • Fuel system
    • Bosch 044 pump
    • Radium fuel pressure regulator holder - eBay special but allows me to use a common Bosch 9.4mm Mini A/38/5 3 bar pressure regulator
    • Fuel rail is stock Jenvey DCNF

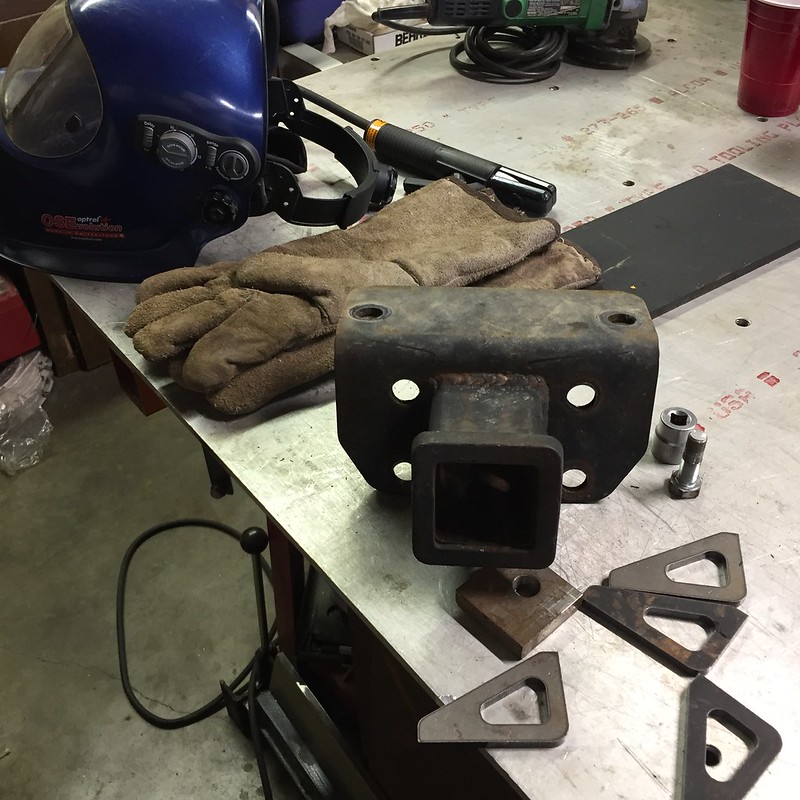
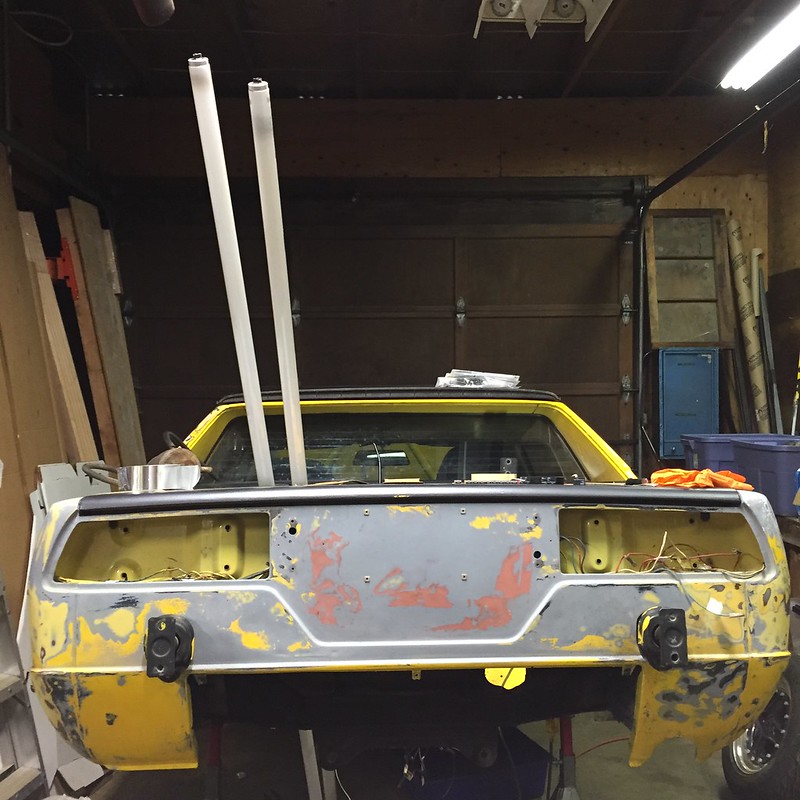
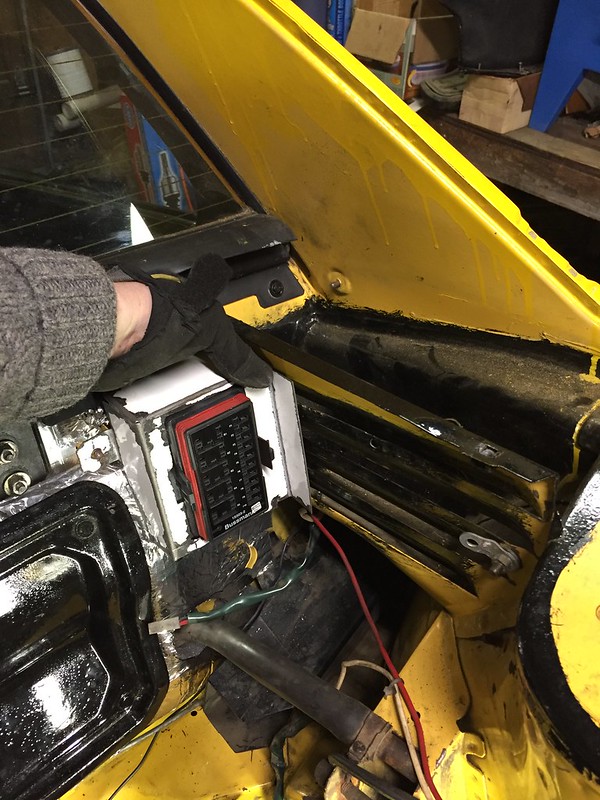
In order to make all this stuff work, I needed to mount a few more things to the car. Specifically made brackets for the power distribution, main breaker, and ECU. Naturally, I spent as much time doing this stuff as possible, because it pushed wiring just that little bit further out.

Power distribution bracket: I started with carboard templates, specifically three revisions. When I was ready to transfer to metal, I discovered I was all out of 20-ish gauge steel. I spotted a supply in an old fixture hanging from my ceiling. But first, ponder Italian Bosozoku:

Sheet metal liberated from here:

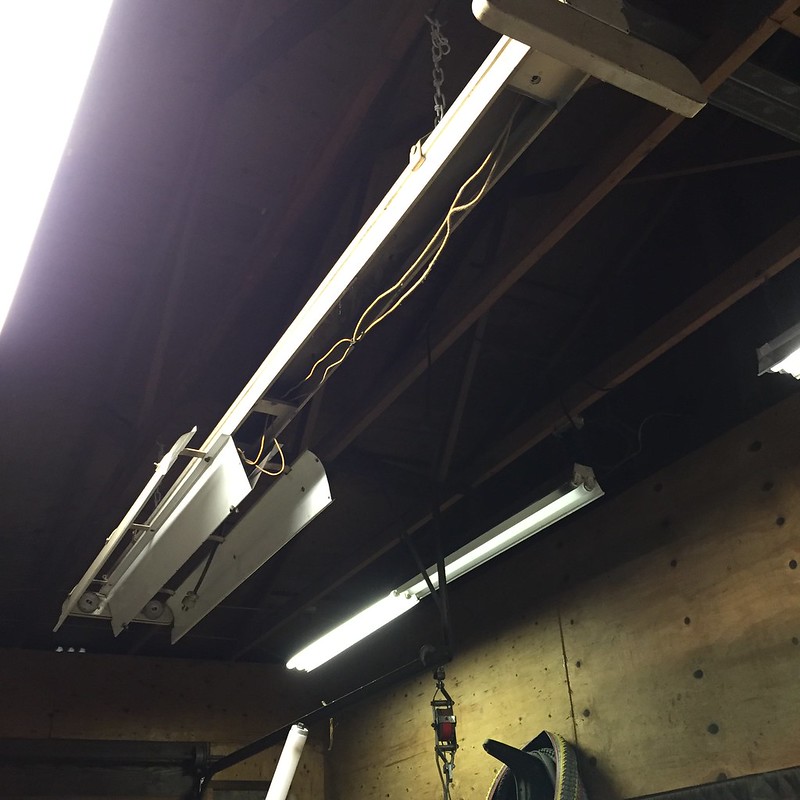
Transfer to metal. Grumble because your free metal has porcelain on both sides. Yes, legit porcelain. It makes a total mess of your shop.
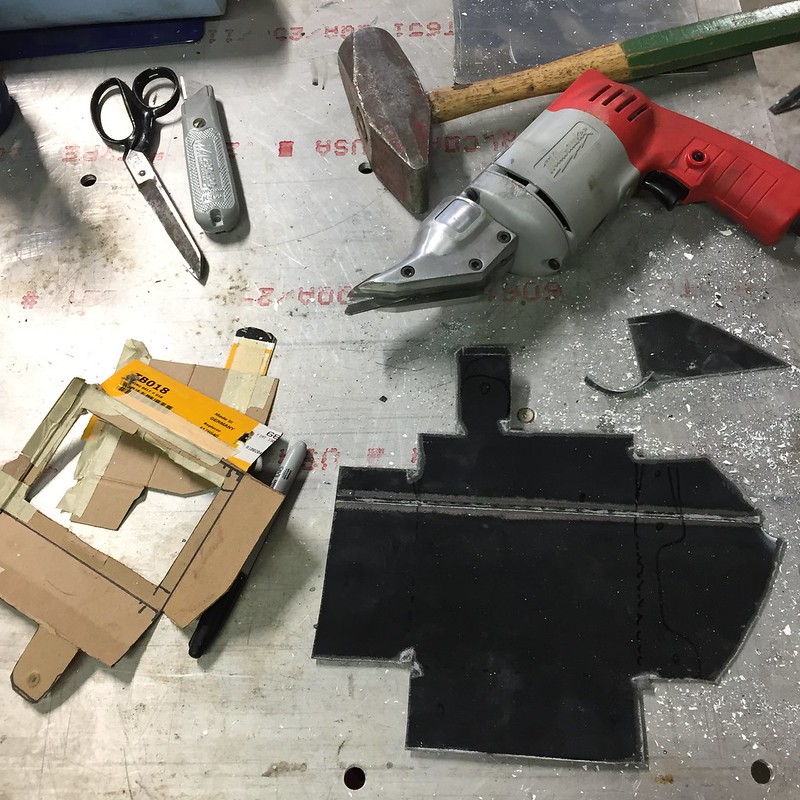
Mocked up:

After chipping off all the porcelain, my sheet metal had more in common with a golf ball than smooth metal. Bondo liberally with Hungary Bill's year old leftovers:

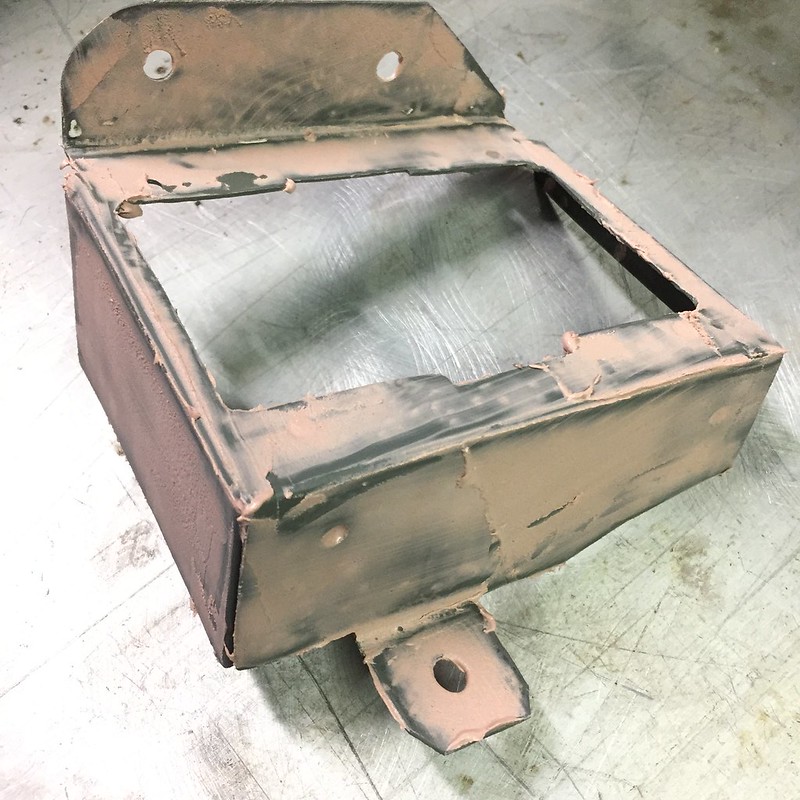
I then proceeded to make another bracket for the main circuit breaker, visible here with the sanded and primed power distribution bracket:

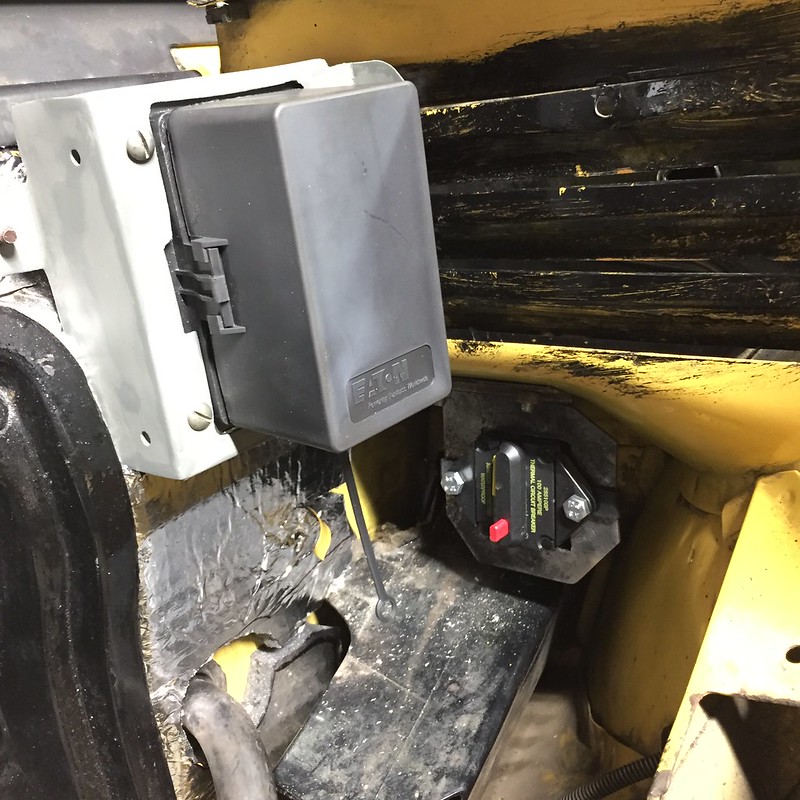
Flat head fasteners above also came from the light fixture - I plan to replace them out of simple hatred of flat head fasteners.

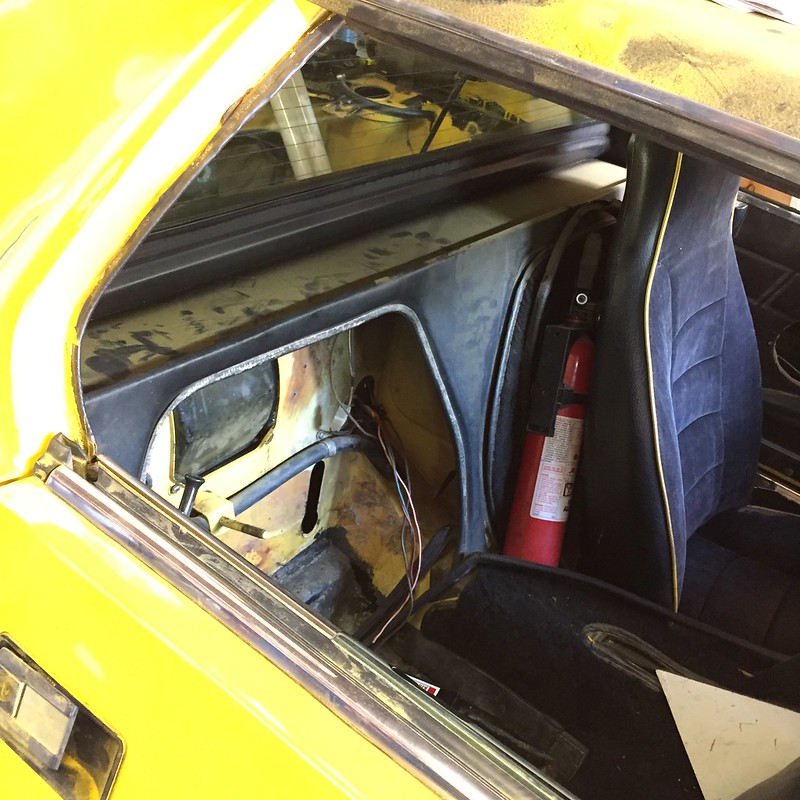
Next bracket was for the ECU itself.

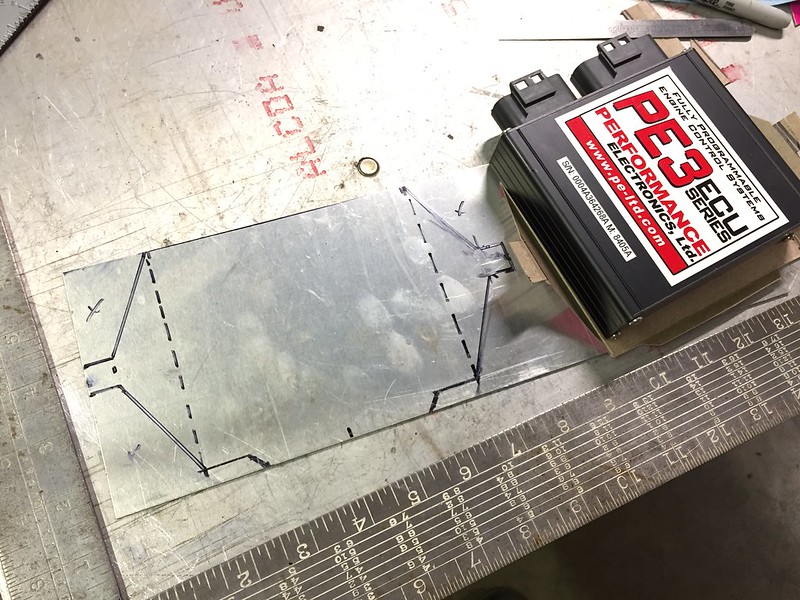
It will live in the spare tire well behind the passenger seat. There's tons of room in there to mount the ecu without interfering with the spare, and yet still allow service loops in my wires to make things easy to access. It will be tucked up in the false firewall in the center of the car (left to right), shown here in this general area:

Mount is finished - I need to pick up an o-ring to use in place of the rubber bands, but I discovered this morning that an elastic hair tie will work pretty well too.

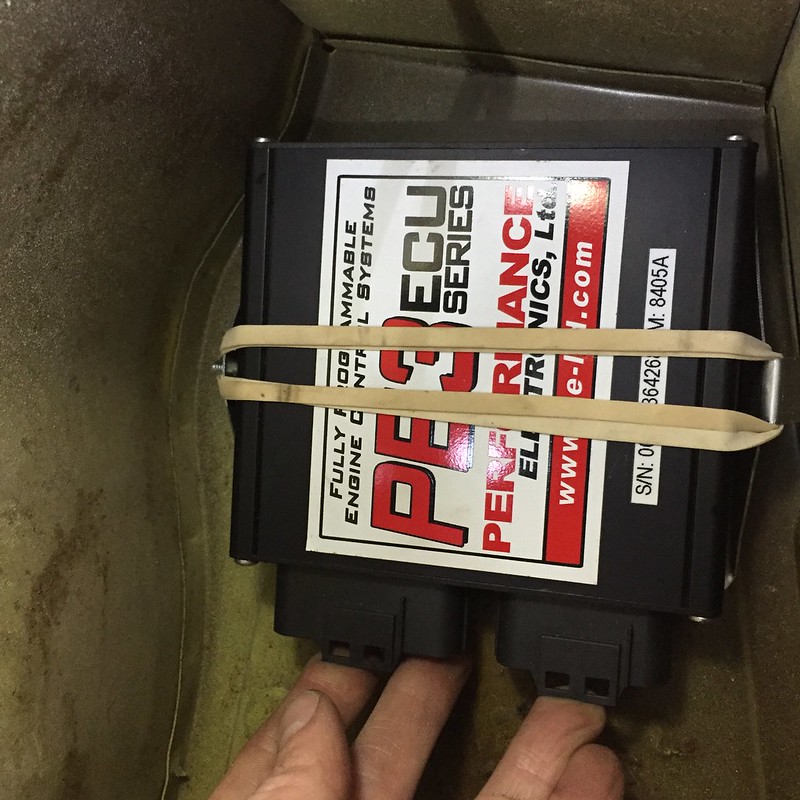
I'll rivet the mount in place, add a little foam padding, and call it done.


Mezzanine
Mezzanine Dork
5/4/18 11:59 a.m.

My bottoming tap showed up yesterday too - I finished tapping the coolant passages to the intake manifold and plugged them with some stainless grub screws and a bit of teflon tape coated in pipe dope. This is where the coolant continued to leak with the last engine, even after replacing the intake manifold gasket.

I bought one of those fancy Remflex gaskets recommended earlier in the thread, and I'm optimistic it will make a big difference. Also, my cylinder head manifold surfaces looks grungy in the above photo. Need to get that scrubbed down.

Mezzanine
Mezzanine Dork
5/4/18 12:12 p.m.

200th post in this build thread calls for a momentous update. I've actually started wiring! No more procrastination. I made a jumper from the main breaker to the power distribution module. Result!

Of course it was a little bit too short to run with the bends it needs. No worries, it will just become a jumper for the ground bus. I didn't mention it earlier, but all wires will be loomed in high-temp expanding braid, with double wall adhesive lined heat shrink terminations.

Started laying wires into the engine bay to see where stuff goes.

6 7 8 9 10

You'll need to log in to post.

Our Preferred Partners
DcIrj2R3bZXKWb4dZBg2oYDzz9eDrHK5DPSEa2cHiLQMIF0pNH2yQJGPPHOSMpkz